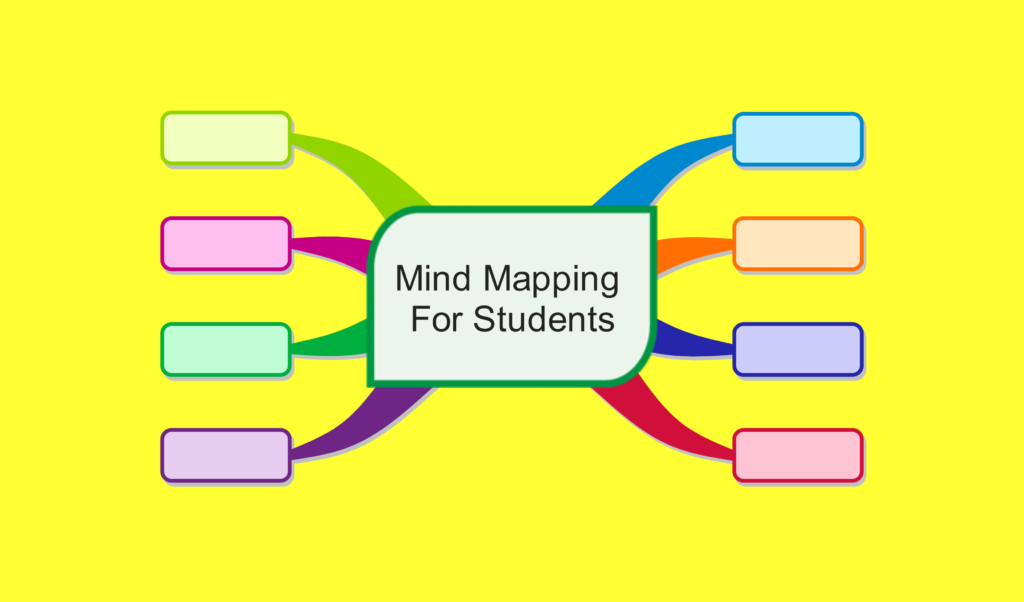
Do you think mind mapping is only for professionals? You are wrong. It’s also for students who can benefit from mind mapping even more than professionals do.
Mind mapping is a valuable tool for students as it helps them with their main jobs of learning, studying, memorizing, retention, recalling, and reviewing the learnt material before exams. Students can create mind maps for any topic they study in few steps, and they can use digital mind mapping tools or physical ones according to their budget.
It’s also worth noting that since we’re talking about mind mapping for students then it’s for everyone studying or learning anything at any point in their life and we’re not just talking about school or college students, we’re also talking about professionals doing post graduate studies as well.
Content Covered Today:
What is mind mapping?

Let’s start with mind mapping definition. Mind mapping is a visual way of representing a group of ideas and information in one image showing colored and connected keywords.
A mind map can take any shape or look according to the amount of content you need to include in a mind map and that’s the beauty of mind mapping, that it has no limit unlike the traditional linear way of taking notes.
Another strong point about mind mapping is that regardless of the order you use, you still can easily connect related content together with arrows or lines or grouping them in one outlined shape.
It’s easy to say that with all the above features I explained that mind mapping is a tool that gives you freedom in capturing the information in any way and relaxation that you’ll be able to create connections needed regardless of the order of the information. These benefits aren’t exactly applicable with the linear way where you have to follow certain order and it’s hard to do some connection between what’s on top of the page and what’s on its bottom for example.
What are the benefits for mind mapping for students?
To understand the mind mapping benefits and importance of mind mapping to you as a student, I need to outline what students actually need when they’re studying which are:
- Ease of capturing information
- Capturing as much information as possible in less space
- Capturing the information in a memorable way
- A way of studying that allows for longer retention
- An easy way of retrieving the information
- An easy way of reviewing the information captured like before exams
I think you agree with me that the above are almost all what any student is thinking of when it comes to studying and learning, and the good news is, mind mapping is a tool that provides all of the above.
With mind maps you can record important points in your subject in any way and anywhere on your paper and in any order. And all you need to record with mind mapping is few keywords rather than sentences and that’s why you can capture more information with mind mapping in one page compared to linear note taking.
Mind maps can have colors and visual clues added to branches to further highlight the information and makes it more memorable than just plain paragraphs, and when it comes to reviewing the information, you’ll have way couple of pages to go through compared to more pages written in the traditional way.
In a nutshell, mind maps generate an image out of the information while the traditional linear way generates large number of paragraphs. It’s easier to memorize, retrieve and review an image rather than plain paragraphs. A picture worth a thousand words, doesn’t it?!
From a science perspective, mind maps have proved its benefits in number of studies where students had higher scores in retrieving the information they mind mapped and scored higher scores in examinations compared to the other group who used the traditional note taking way.
What are the uses of mind mapping for students?
Mind mapping can be used for almost everything like studying, planning, project management, meetings, etc. I’ve explained most of them in separate articles if you wish to know more. For this article however, students can use mind mapping for 2 main uses:
1- Planning with mind maps
Students can use mind mapping for all sort of planning they need to do including planning their day and week, planning their studying, and planning for their examinations.
Planning the day and week is important to keep the balance between studying and the daily or weekly tasks you have to maintain as a student like paying bills or cleaning house, or going to the gym, etc.
Planning your learning is the main thing to focus on of course and this one includes what will you learn, when, what day(s), etc. It’s not the studying itself, it’s the preparation for it so that when you study you don’t lose time thinking what to study.
Planning for the examination means your plan for preparing for the examination by planning what to review, when, what day(s), order of subjects to review, etc.
2- Studying with mind maps
This means using mind maps to study the material itself by breaking it into main headings, subheadings, and main keywords with visual clues and connections added to it as needed. This can be done into several layers because you won’t be able to mind map the whole book into one page and still have meaning out of it or use it for examination, but you can create mind maps in layers as follows:
- A mind map for the main chapters of whole book: You can use this to add some notes to each chapter like difficulty, points to consider, importance, order of chapters to review before exams, etc. You have limitless uses for this layer. The above are what I personally use when studying.
- A mind map for each chapter: this layer can be used to summarize the whole chapter as well, outlining key topics, highlighting important parts mentioned by the teacher or professor, etc. If the chapter is very thin you can treat it as the main mind map to use in your studying and include all needed information.
- A mind map for topic: this is where you create a mind map for the actual topic with all the needed information to learn and use in examination. Most commonly you can mind map the whole topic in one mind map, but where the topic is very rich in information, you can create individual mind maps for each main point in that topic.
One recent example I have is when I tried mind mapping “Bipolar Disease” and couldn’t do it in one mind map and I ended up creating a mind map for the definition, etiology, history, distribution, signs and symptoms and another mind map for the management of the disease including history, investigation, diagnosis, differential diagnosis, and treatment.
How can students create mind maps?
Now it’s the fun time of creating your mind map as a student. All you need is a good sized page, mostly A4 or US letter, and few colored pens, the more the better of course. For now, just grab any empty page and a pen to practice creating mind maps.
1- Center topic
Every mind map requires a central topic that you’ll focus on. That’s why it’s important to choose it right, if it’s for the whole topic of “Bipolar disorder”, then I’ll write that in the center of the page, if it’s part of it like “treatment of Bipolar Disorder”, then that’s what I’ll write in the center of the page not “Bipolar Disorder”. This is beneficial for me to know what the mind map is all about and it’s making me focus on that topic.
There are countless ways you can create that central topic:
- You can just write it down as “Bipolar disorder”
- You can sketch or draw an image representing the topic, so I can draw a face split into two halves, one happy and one sad
- You can write it and include the drawing
- You can circle the topic or leave it as is
Your turn, think of the topic you want to mind map and write it or draw it in the center of the page you have.
2- Main branches
Now that you have your central topic, you can create the main branches that radiate from it. Those branches are typically the headings of that topic. So in my example, this includes sings, symptoms, investigations, and treatment of the disorder for example. Like the central topic, you can write them down, sketch them or mix the two.
Your turn, capture the main headings of your topic in branches radiating from the central topic
3- Secondary branches
After you captured the main points of your topic, now you can highlight sub headings of each main branch you highlighted if only there are subheadings, otherwise, you capture the information related to that branch right away. In my example the main branch of “treatment” will have secondary branches called “Medications”, “psychotherapy”, and “hospitalization”. In some cases, you may find that the main branch itself doesn’t have further layers to it like “etiology” or “history” of Bipolar disorder. At this point, I can immediately start recording data to study.
Your turn, are there any secondary main points to include under the main branches you’ve just created above? If yes add them, if not, you can now add the information needed for each main branch above.
4- Further branches
At this point, you just keep creating further branches to capture main points just like the secondary branches, or you can immediately include the key information for the previous branch. In the “Medication” branch I can now add the different medications used in Bipolar and under each medication I will add further branches for the key points to memorize like dosage, side effects, mechanism of action, and monitoring it, and I can include these information in branches radiating from the “medication” branch itself or I can create from the “medication” branch further ones like “dosage”, “side effects” and then add the information to these branches.
You just keep on creating further branches till you have captured all the information you need.
That’s a very basic mind map that you’ve just created now that has central topic and branches radiating from it. What you can now do is putting another layer on top of it using colors and connections.
5- Colors
With colors you can choose to color branches to emphasize meaning and make the mind map more memorable and you can do it in number of ways. You can choose a certain color for each main branch to make it easier for you when reviewing the map later, specially if it’s rich in content. This way you can easily track the secondary branches that belong to the main one you’re reviewing or reading.
Another way is to use a specific color for the main branches, then another color for the secondary branches, then a third one for the tertiary branches and so on. This way you can identify level of branches quicker and is useful if you just to need to revisit and review the main headlines and sub headlines for a topic prior to an examination for example.
6- Connections
You can choose to create some connections between different branches if they have some relation like one branch is dependent on the other one or leads to the other one or affect the other one.
7- Visual clues
You can choose to add visual clues to branches to make them pop and make it easy for you to memorize. These visual clues can be numbers, shapes, graphics, or icons.
Mind Mapping Examples for Students
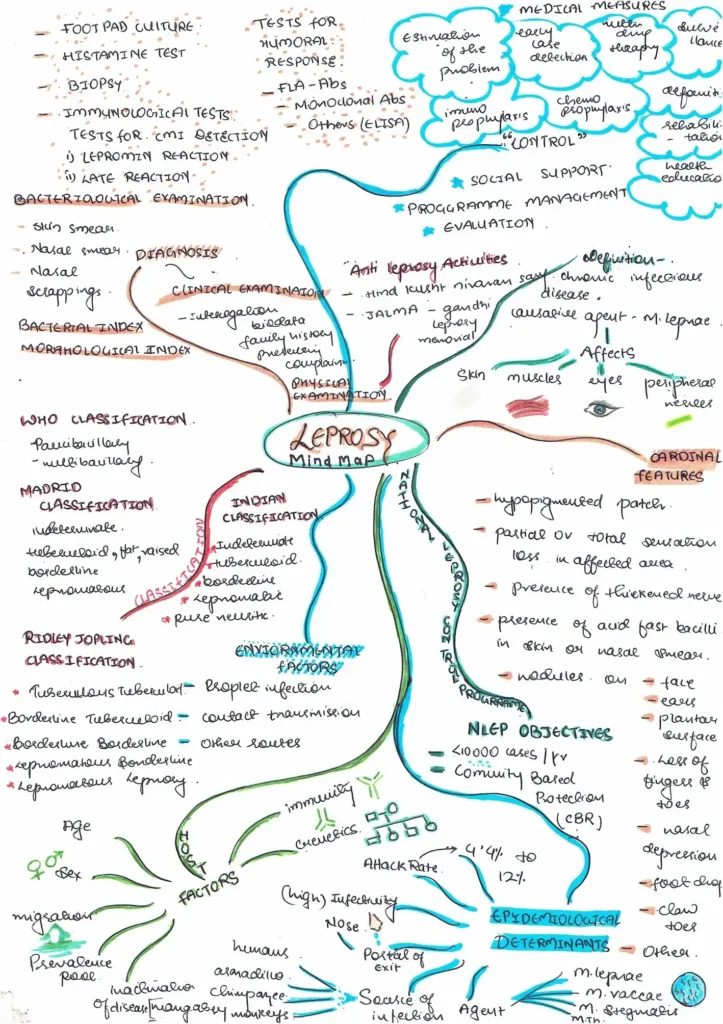
Here are few mind maps examples done by students for different topics like medicine, science, and business
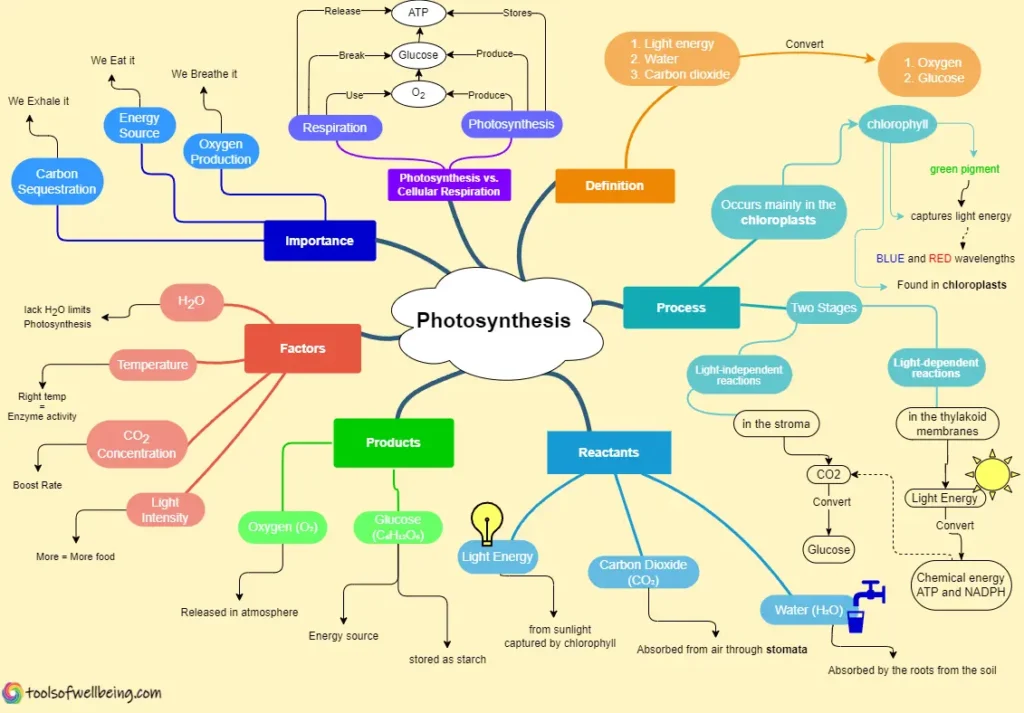
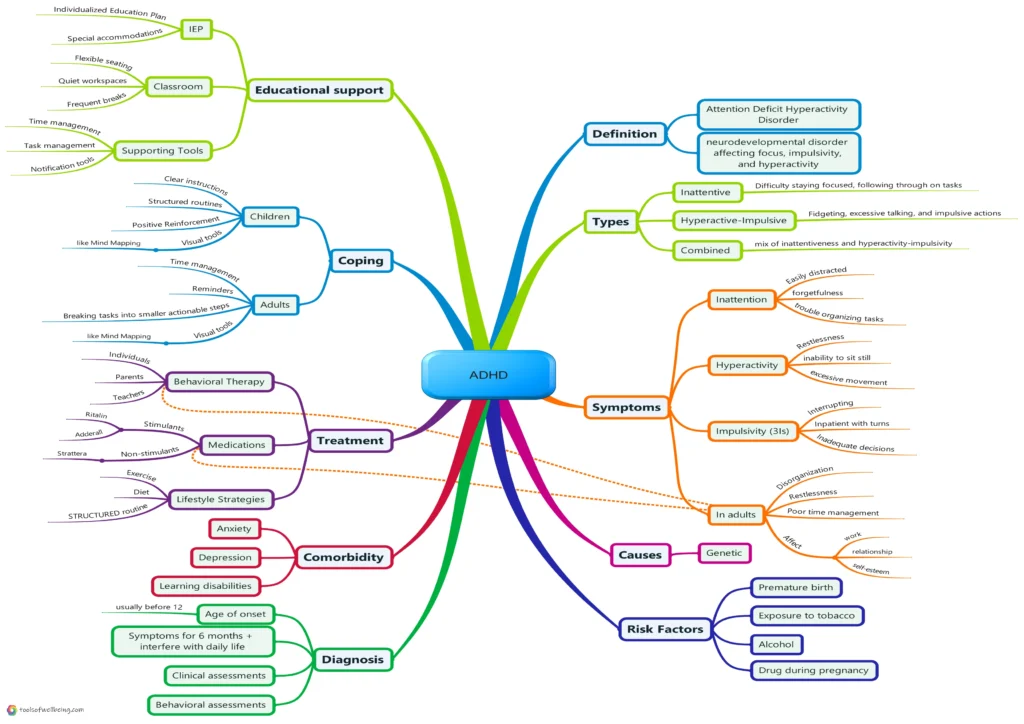
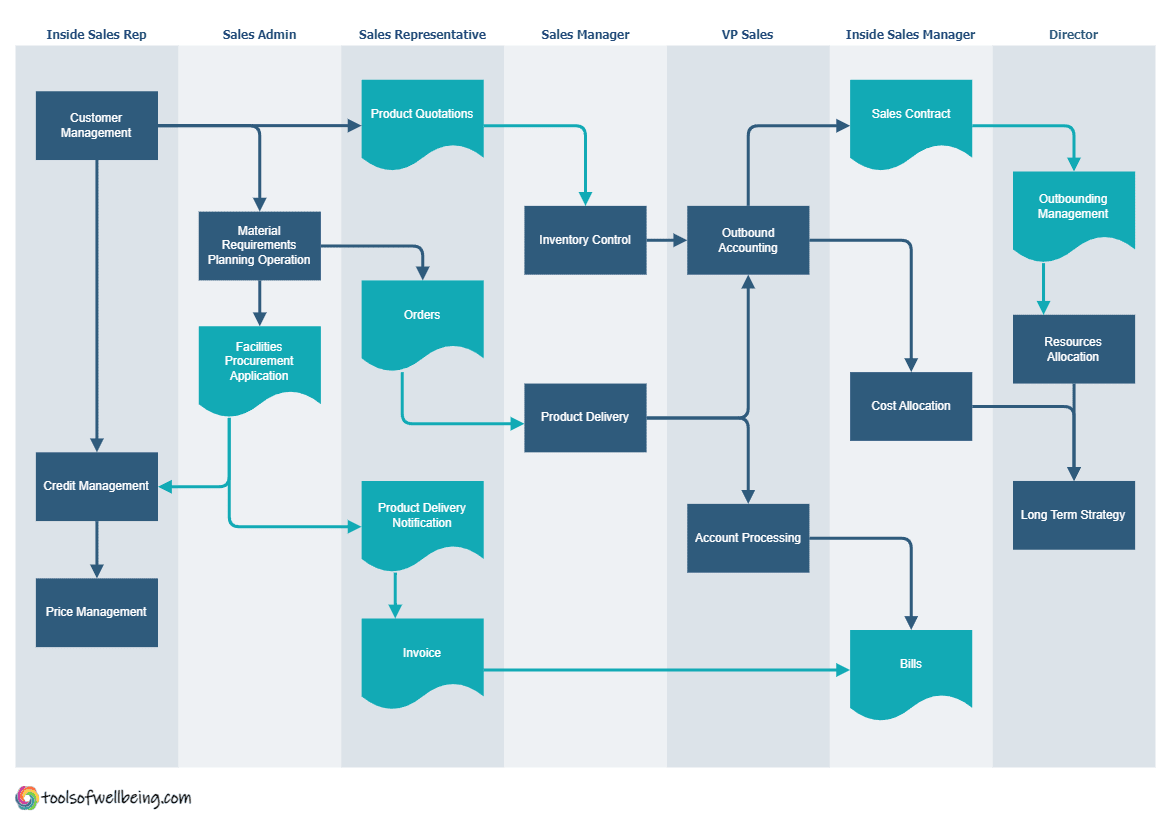
Best tools for mind mapping for students?
There are a ton of mind mapping tools out there to use, some exist only online, some are available only as programs, some are hybrid available both online and as a program, and some are physical tools where you can use your hand like using pen and paper method.
I created a specific article about Best Mind Mapping Tools sharing 12 digital mind mapping tools and 6 physical ones explaining all details so it’s better to check it out for more information, and here I’ll explore few ones that I use personally.
1- Pen and Paper
The cheapest mind mapping tool ever which is available everywhere. Any page size can work, and I find that A4 or US Letter sizes are going to be your best choices.
2- Mind Mapping Notebook
This the upgrade version of the pen and paper, a $7 well-designed notebook I created for mind mapping beginners with a brief mind mapping guide, 50 unique templates to practice with and 80+ blank pages to mind map freely.
3- MindManager
It’s my personal favorite digital mind mapping tool that I use for almost 9 years now with very powerful features to create mind maps and do project management tasks using mind maps.
4- Drawio
Free desktop application that I use too with MindManager because it has better exporting resolution to images and good with flowcharts creation.
Conclusion
I was lucky to embrace mind mapping years ago in my professional life and it has supported me a lot during my post graduate studying till now, and I’m sure I would have benefited more from my studying and learning in school or college with mind mapping. I strongly recommend all students to learn and start creating mind maps while studying and learning as early as 4th or 5th grade to make learning more fun and memorable and decrease stress during examinations.